CakePHP - Environment Setup - Ubuntu
Hello everyone, In this tutorial, we will set up a CakePHP development environment in Ubuntu. We’ll install Apache2 HTTP, MariaDB, PHP 7.2, Composer and CakePHP in order to provide you with the tools necessary for developing web applications with CakePHP.
Step 1 — Install Apache2 HTTP
Apache is available within Ubuntu’s default software repositories, making it possible to install it using conventional package management tools.
Let’s begin by updating the local package index to reflect the latest upstream changes:
- $ sudo apt-get update && sudo apt-get -y upgrade
Then, install the apache2 package:
- $ sudo apt install apache2
After installing Apache2, the commands below can be used to stop, start and enable Apache2 service to always start up with the server boots.
- $ sudo systemctl stop apache2.service
- $ sudo systemctl start apache2.service
- $ sudo systemctl enable apache2.service
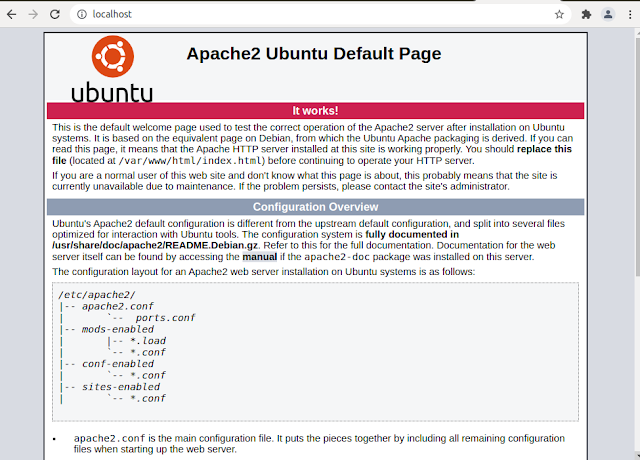
Confirm whether apache is successfully installed on your machine.
Step 2 — Installing Database server[MySQL or MariaDB]
You have to install any supported database server for storing project data.
Run the command to update the system and install the MariaDB server and client.
- $ sudo apt-get update && sudo apt-get install mariadb-server mariadb-client
After that, run the commands below to secure the MariaDB server by creating a root password and disallowing remote root access.
$ sudo mysql_secure_installation
Answer the questions, like below:
After installing MariaDB, the commands below can be used to stop, start and enable MariaDB service to always start up when the server boots.
- $ sudo systemctl stop mariadb.service
- sudo systemctl start mariadb.service
- sudo systemctl enable mariadb.service
You can use the following command to find out if MariaDB is installed and running.
$ sudo systemctl status mariadb
You see the following output in your terminal:
Step 3 — Install PHP 7.2 and required PHP 7.2 Extensions
- $ sudo apt install php7.2 libapache2-mod-php7.2 php7.2-common php7.2-gmp php7.2-curl
- php7.2-intl php7.2-mbstring php7.2-xmlrpc php7.2-mysql php7.2-gd php7.2-imap
- php7.2-ldap php-cas php7.2-bcmath php7.2-xml php7.2-cli php7.2-zip
- php7.2-sqlite3
Step 4 — Install Git and Composer
Run the command to install git
- $ sudo apt-get install git
If you didn’t install composer before then run the following command to download and install the composer.
- $ curl -sS https://getcomposer.org/installer |
- sudo php -- --install-dir=/usr/local/bin --filename=composer
Now type composer in the terminal to check that it is properly installed or not.
$ composer
With Composer, you will be able to install the latest version of CakePHP on your machine.
Step 5 — Create CakePHP Database
Logon to MariaDB
- $ sudo mysql -u root -p
Then create a database called cakephp
- $ CREATE DATABASE cakephp;
Then create a database user called cakephpuser with the new password
- $ CREATE USER 'cakephpuser'@'localhost' IDENTIFIED BY 'your_password';
Next, grant the user full access to the cakephpuser database.
- $ GRANT ALL ON cakephp.* TO 'cakephpuser'@'localhost' WITH GRANT OPTION;
Finally, save your changes and exit.
Step 6 — Install CakePHP Framework
Create a directory for your CakePHP project.
- $ sudo mkdir /var/www/cakephp cd /var/www/cakephp sudo composer create-project --prefer-dist cakephp/app
Then edit the /var/www/cakephp/app/config/app_local.php file and input the database info you already created, then save.
Run chmod command to set the permission.
- $ sudo chown -R www-data:www-data /var/www/cakephp sudo chmod -R 755 /var/www/cakephp
Next, restart Apache2.
- $ sudo systemctl reload apache2
Start the server by running the commands below:
- $ cd /var/www/cakephp/app sudo bin/cake server
Open your web browser and access http://localhost:8765
Congratulations!


